Mobile Payments: Leave your wallet at home!

How many times have you rushed to work only to realize that you have forgotten your wallet at home? Well, the only option then is to borrow money from your co-workers (for lunch or the odd coffee) and this can be quite embarrassing! And now think about the one thing you never leave home without these days? You guessed it right – your mobile device. People are glued to their smartphones throughout the day and sometimes, even in bed.

The mobile world presents a great opportunity for any seller to accept payments using your mobile phone. If your mobile phone was also your wallet, you would never have to carry your “real” wallet.

Just out of a curiosity to see how such a concept would work, I decided to install a mobile payment app on my Android phone.

Setting up Mobile Payments

Before paying using my smartphone, I had to enable NFC, download the mobile payment app, register my credit card, and configure the app itself.

Following are the step-by-step procedures:

1. Enable NFC: First, I enabled the Near Field Communication (NFC) feature on my Android phone. NFC allows smartphones to communicate with other devices in the vicinity. The communication is encrypted. Smartphones that do not have NFC cannot be used for mobile payments (for example, the iPhone). As soon I enabled NFC, a N sign appeared on the top of the screen.

NFC

2. Download the Mobile Payments App: I downloaded the CIBC mobile payments app. You can download the mobile payments app for your credit card/bank.
3. Call the bank to activate: There was a manual process involved with CIBC. I had to make a phone call to CIBC to activate mobile payments for my credit card.
4. Receive notification from CIBC Mobile Payments: Once I received the notification, I knew the activation was successful.
5. Set a password: This step is optional. For security reasons, it is better to set a password – just in case your mobile phone is lost or stolen.

Passcode

The configuration was complete and the app said ‘Congratulations!‘.

Config_Done

Making a Mobile Payment 

Once the setup was complete, I tried to figure out how I could make a payment. Surprisingly, making a payment was extremely simple.

1. Launch the Mobile Payment app (CIBC) on your smartphone. Enter your password if you have set one.

Launch_app

2. Tap the credit card to activate Pay Mode for 30 seconds.

Pay_Mode

3. Tap your phone on the payment terminal. You can also move your smartphone within 10 centimeters of the payment terminal. The payment is processed.

Security Features in Mobile Payments

The mobile payments app has many security features:

  • Call the bank to add your credit card. This ensures someone else is not activating your card.
  • Password on the mobile payments app. This is in addition to the password on your phone.
  • Pay Mode deactivated in 30 seconds. This ensures that your credit card information is not read from your phone when you don’t want it to be read. You are always in control.
  • Communication between the smartphone and the terminal is always encrypted.

Advantages of Mobile Payments

  • You don’t need to carry your wallet.
  • Reduce credit card theft. Since you are not swiping your credit card anywhere, it cannot be read by hackers.
  • Any terminal that accepts VISA payWave® or MasterCard PayPass™ will also support NFC transactions.

Disadvantages of Mobile Payments

  • There aren’t many touch-to-pay terminals at the moment.
  • Not all credit card companies offer mobile payments.
  • Not all mobile carriers offer mobile payments.
  • You need a separate SIM card to enable mobile payments (provided by the carrier).
  • If smartphones are lost or stolen, the credit card details can be extracted by a smart hacker.

The smartphone industry is growing at an alarming pace. Up until yesterday, your smartphone was your computer, camera, and maybe even your bathroom mirror. Today, smartphones are credit cards and mobile payment terminals. You can now forget your wallet at home and you don’t need to borrow lunch money from your co-workers!

Disclaimer: The Digital Dimension of Technology is an independent technology blog. We have not been endorsed by Rogers, Samsung, CIBC, or Google (Android). We do not endorse the security, usability, and reliability of mobile payments. 


Advertisement

Octa-core Superphones: When a Single Core is just not enough!

I was surprised to hear that the Samsung Galaxy phones will have an Octacore processor (a processor with 8 cores). A smartphone is essentially a computer – like our home computer. What do we really do on a home computer? We surf the Internet, create documents, and play movies. Among other components, a computer contains a Central Processing Unit (CPU) to perform all these tasks. Traditionally, older CPUs had a single core.

What is a ‘Core’, really? As a non-technical end-user, why do I really care as to how many cores the CPU in my smartphone has? Before answering these questions, let us talk about something else:

How does a motor vehicle with an internal combustion engine work?

Scooters have an internal combustion engine with a single cylinder, piston, and a spark plug.  When fuel is injected into the cylinder, the spark plug creates a spark and the explosion pushes the piston. Consequently, the scooter moves forward. With a single cylinder comes a limited amount of power. In comparison, the engine of a car has four cylinders. Four cylinders give more power than a single cylinder. More interestingly, the work is equally divided amongst the four cylinders. As a result, one cylinder is not overloaded and one cylinder never overheats.

Let’s compare the processor with an engine and the core with a cylinder.

The biggest challenge chip designers face today is the inefficiency of a CPU in terms of heat emission. Like single cylinder engines, CPUs with a single core produce a lot of heat which makes them inefficient in terms of power consumption. To solve this problem, chip designers created a multi-core processor (like the multi-cylinder engine). The processing is divided between multiple cores thereby reducing heat emissions and consequently reducing power consumption. It is common to see dual-core or even quad-core processors in computers today.

cpu

So far, phones usually had a CPU with a single core. With the launch of Samsung Galaxy, we are entering a new era of smartphone computing. The Samsung Galaxy S6 has an Octa-core processor (8 cores). Why does a smartphone need so much power? When a home computer can do everything with a slower processor (and single core), why does a smartphone need a faster processor (with 8 cores)?

The Samsung Galaxy has the following components that a home computer or even a basic business computer does not have:

Smartphone_Sensors-1

  • GPS tracks your location.
  • Proximity Sensor turns the screen off when you hold it to your face.
  • Ambient Light Sensor automatically adjusts brightness.
  • Accelerometer senses movement and orientation.
  • Barometer measures pressure.
  • Temperature Sensor measures the temperature.
  • Humidity Sensor measures the humidity.
  • Magnetic Sensor measures the magnetic field.
  • Gesture Sensor senses your hands to navigate.
  • Infrared Sensor turns the phone into a remote control.
  • Eye Tracker pauses video when you look away.
  • NFC (Near Field Communication) shares data by touching two phones and also enables mobile payments.
  • Dual Cameras are available; one on the front and one on the back of the phone. Both cameras can record simultaneously in the Samsung Galaxy S6.
  • Dual Microphones are used in the phone; one microphone for voice and the other to listen to the ambient noise and create anti-noise using the noise-cancelling system.

These sensors constantly gather large amounts of data and need constant processing. A CPU must have multiple cores to compute all this data simultaneously. The CPU assigns tasks to different cores, keeping a single core from overheating. Less heat is generated and hence, less power is consumed.

With battery technology not evolving as fast as CPUs, manufacturers don’t have a choice but to make CPUs that are  more efficient in terms of power consumption and heat emission. Unless better batteries are developed, smartphone manufactures will strive to use better processors with each new model to remain competitive. (You might want to read more about my idea on battery technology in my earlier post Is the Smartphone Industry Curious about Curiosity?.)

Next time you use your smartphone, you might want to count the number of sensors it has. It would be really interesting to see how many of us are able to identify all the sensors on our smartphones!

When Earthlings become Martians

Did you ever wonder about traveling to another planet? Were you glued to sci-fi books and movies as a kid? If yes, read on. There’s a huge project underway to build a Human Colony on Mars. And interestingly, you can now be a part of it thanks to Mars One.

About the Mars One project

Mars One is the company that will give you an opportunity to live on Mars. The Mars One project involves sending four people to Mars every two years. Now, these are not astronauts or space-pilots, but regular people like you and me.  This is a great opportunity for people who want to be a part of a new era. Bas Lansdorp launched Mars One in 2012. He has an impressive team, well-known advisers and strong suppliers. Here is a cool promotional video.

The journey from Earth to Mars will take 7 months. The travel through space will be a great experience where you can view the stars, planets and asteroids with naked eyes. And finally, walking on Mars, an even better experience!

Mars_Landscape1
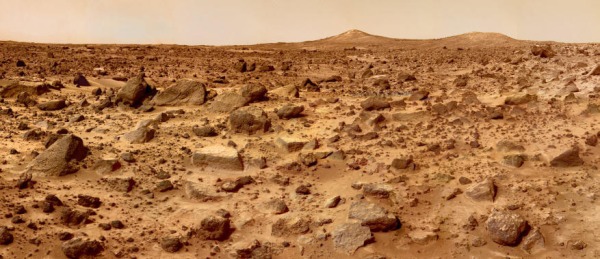
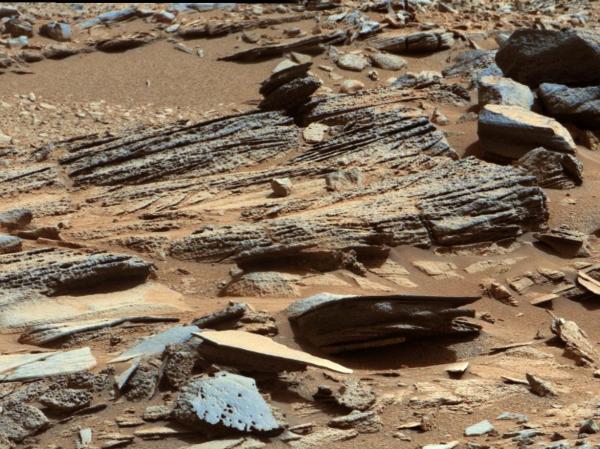
Mars Landscape. Photo by Mars Rover Curiosity: Courtesy NASA/JPL-Caltech 

The catch? It is a one-way ticket. You go to Mars, never to return.

Mountain_Top_Created_in_Crater_MRO
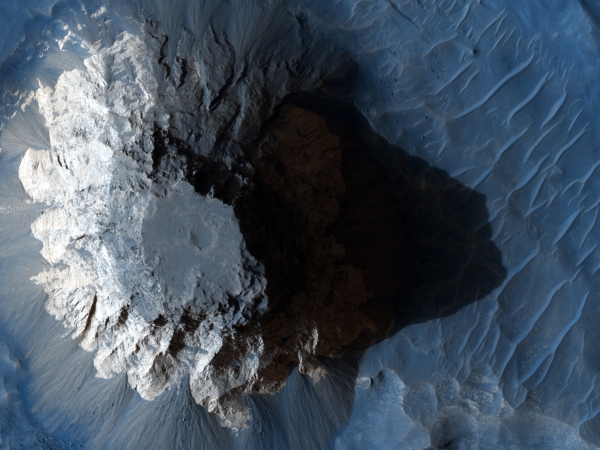
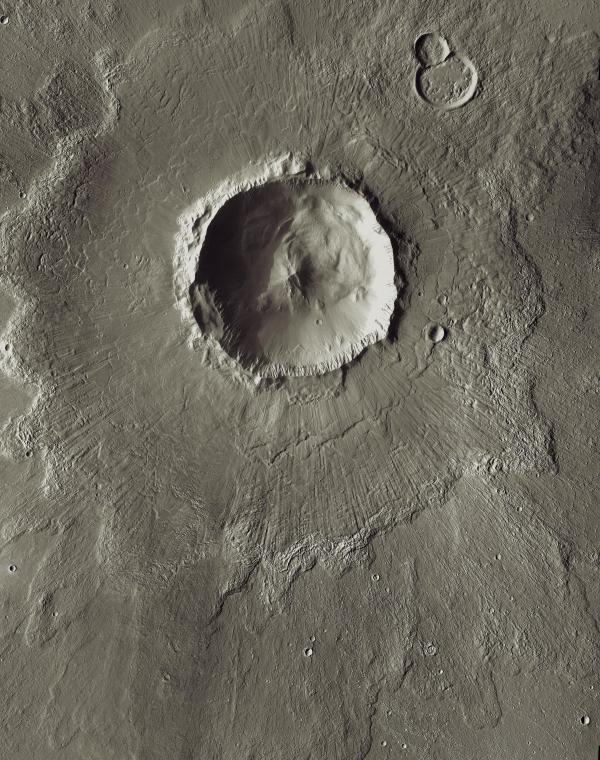
Top of a mountain that was created inside a crater due to impact. Photo by Mars Reconnaissance Orbiter. Courtesy NASA/JPL/University of Arizona

Here’s the roadmap for the Mars One project:

2013 – Accepting applications for going to Mars.
2014 – Building the first communication satellite.
2015 – Astronaut selection process will be completed.
2016 – A supply mission that will carry 2,500 kilograms of supplies to Mars.
2018 – A space exploration vehicle will be sent to Mars to pick a location for settlement.
2021 – Six capsules and another Rover will be sent to Mars. This will include two living units, two life-support units and two supply units.
2023 – History will be created! The first colonists will arrive on Mars.
2025 – A second group will be sent.
2033 – The number of colonists will reach 20.

The coolest feature of the Mars One project is that everything will be done using currently available technology. This means, no traveling at the Speed of Light like you read in science-fiction books. The Mars One project will only use technology of today that is reliable and tested.

Bacolor_Crater_Mars_Odyssey
Bacolor Crater. Photo by Mars Odyssey: Courtesy NASA/JPL-Caltech 

Why do we need to explore other planets?

Hundreds of explorers weathered deadly storms to discover new continents. Consider the Mars One project to be another exploration – but this time, in the solar system rather than on Earth. We could discover new ways to live and learn so much about living outside Earth.

Mars_Sand_Dune_MRO
Sand dune on Mars. Photo by Mars Global Surveyor Orbiter: Courtesy NASA/JPL-Caltech 

Aren’t there other planets that can support life better than Mars?

Astronomers have been trying their best to find a Goldilocks planet where life can be sustained. A Goldilocks planet is a planet that is neither too far or too near to its Sun. If it was too far from the Sun, it would be too cold and being too near would make it too hot to sustain water and any other life on its surface. Most of the planets we have found are so far away, that it is impossible to go there with the current technology. Take  Gliese 581 d for example, which is a Goldilocks planet that was discovered recently. Gliese 581 d is 20 light-years from Earth. This means it would take us 20 years to reach there if we were able to travel at the speed of light! Since traveling at the speed of light is not going to happen anytime soon, I don’t think Gliese 581 d is an option for now.

Evidence_of_Water_Stream
Evidence of water flow. Photo by Mars Rover Curiosity: Courtesy NASA/JPL-Caltech 

Why Mars?

This, by far, is the most important question and has many interesting answers:

  • Water – Mars has underground ice deposits and frozen polar ice caps that show an abundance of water. If we were to melt the polar ice caps on Mars, there would be enough water to cover the entire planet upto a depth of 11 meters. Now, that’s a lot of water! Water is the most important medium for life to grow. If not for water, we would not exist today.
  • Gravity – The gravitational force on Mars is 38% that on Earth. Unlike the Moon that has 1/6th of Earth’s surface gravity, Mars has enough gravity to hold down atmosphere, which is essential for life. The atmosphere also protects from solar radiation.
  • Temperature – The high temperature on equatorial Mars is around 35 degree centigrade. This is very comfortable and very Earth-like.
  • Mars Day = Earth day – Mars takes 24.622 hours to rotate on its own axis. This means that the day-night cycles on Mars are same as that on the Earth. It would be very easy for Earthlings to adapt to a Mars day.
  • Seasons – Mars has the same seasons as that on Earth. Although, the seasons on Mars are twice as longer since Mars takes 1 Earth year and 320 Earth days (685 Earth days or 1.8 Earth years) to orbit the sun.
  • Soil – The soil on Mars is conducive for the growth of plants. The soil contains Magnesium, Sodium, and Potassium that are useful for plants.
  • Atmosphere – Mars has a sparse and hospitable atmosphere. 95% of the atmosphere in Mars is CO2. Plants need CO2 to breathe and we could take seeds or plants to Mars where they could grow.

Mars_Water_in_the_form_of_ice
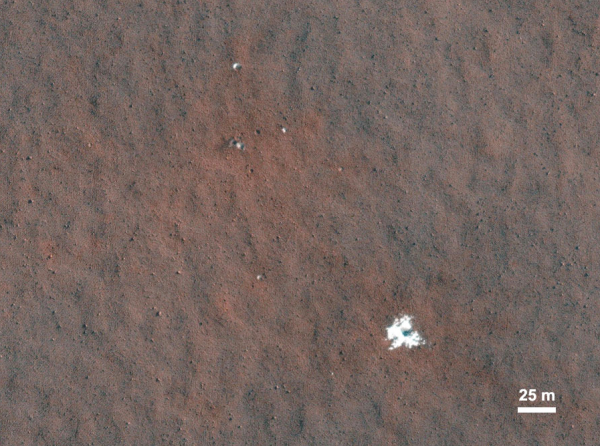
Ice found in a fresh crater. Photo by Mars Reconnaissance Orbiter: Courtesy NASA/JPL-Caltech

Ice_on_Sand_Dune_North_Pole_HiRise
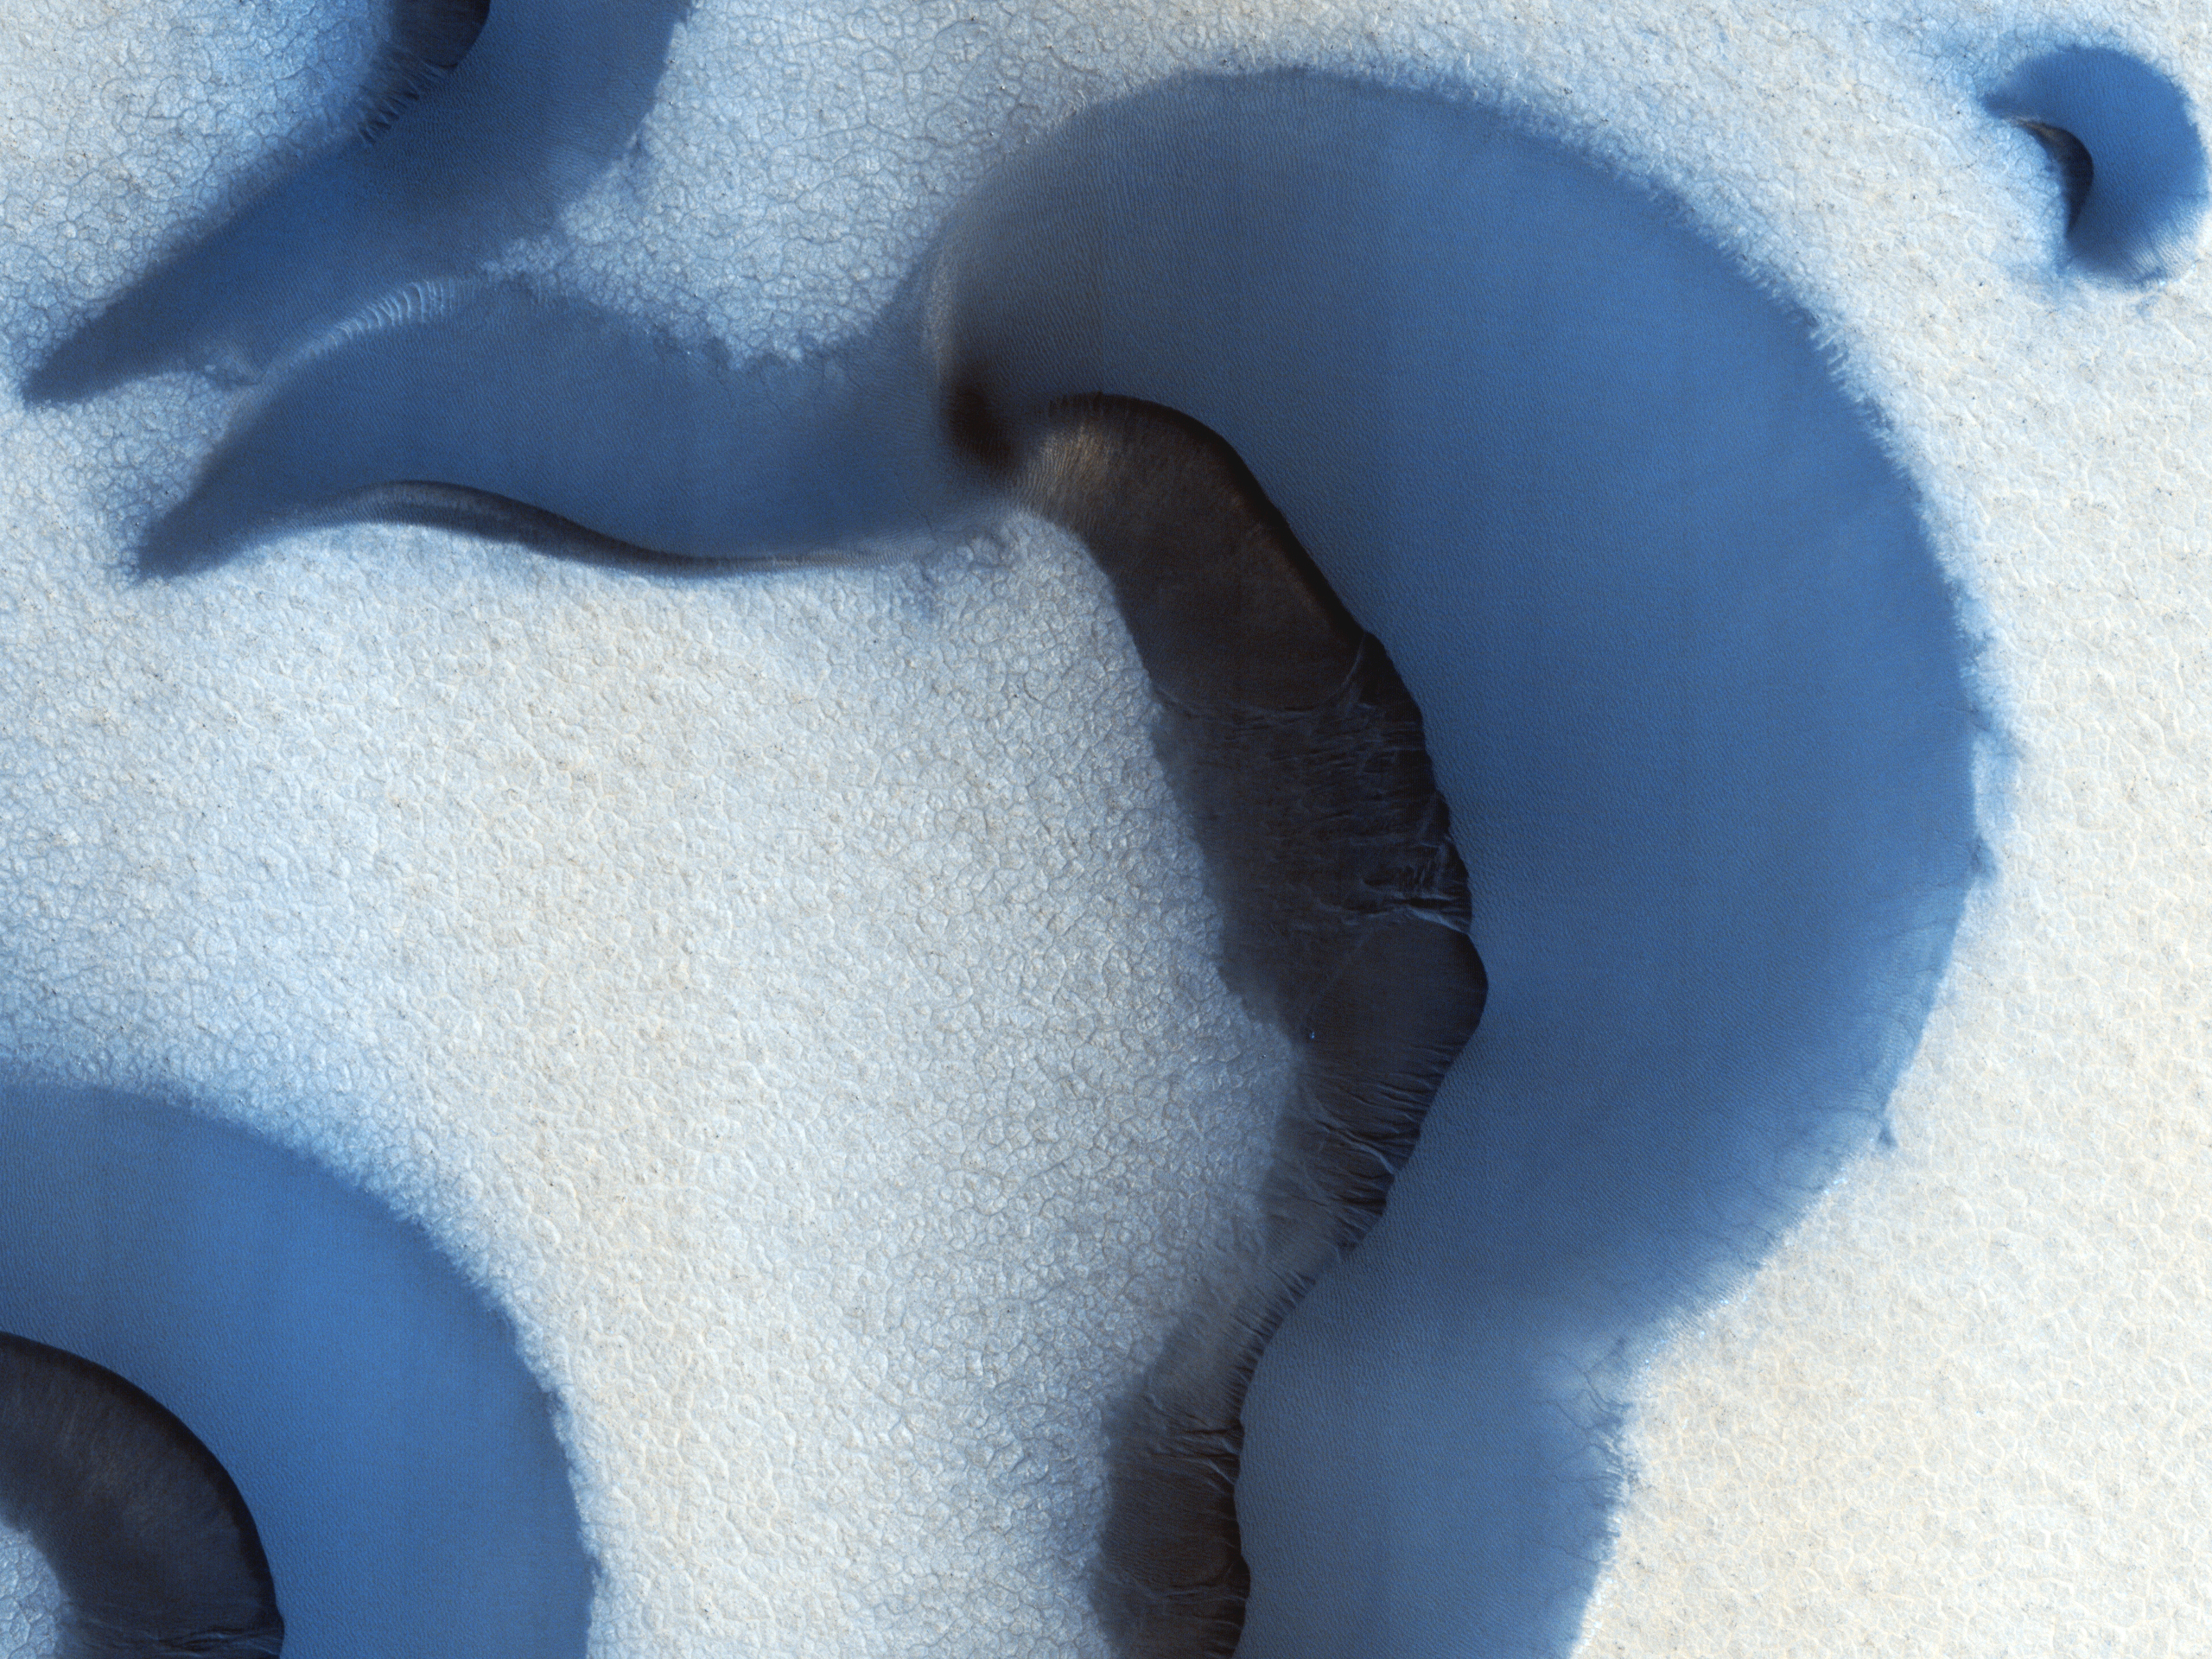
Frosted ice on sand dunes (north pole). Photo by Mars Reconnaissance Orbiter:
Courtesy NASA/JPL/University of Arizona

What are the challenges?

After having talked about the advantages of mars here are a few disadvantages that create huge challenges:

  • Gravity – Since Mars has only 38 % of the surface gravity of the Earth, our bodies (especially bones) will get used to the lower gravity. Even if we wanted to return to Earth in the future, our bones would have weakened by adapting to the lower gravity on Mars. Our bones would be strong enough for Mars, but returning to Earth will just crush them due to the higher gravity. Although there has been enough research and treatment is available for astronauts living in zero gravity, our bones would develop a condition called osteoporosis (bones become porous). That’s why the colonists can never return to Earth even if they wanted to.
  • Atmosphere – With 95% carbon-di-oxide in its sparse atmosphere there would be no option but to wear spacesuits. We can build greenhouses to grow plants that would convert CO2 to O2, but this is really challenging. After all, we would need a good stock of oxygen to tide us over until we are able to generate oxygen on Mars.
  • Medical Services – We are on our own if we fall seriously ill. Mars One does plan for basic treatments. However, it would not be possible to provide the advanced treatment available on Earth today (for example a complicated surgery).
  • Natural Calamities – Since Mars is unchartered territory, Mars quakes (Earthquakes, but on Mars!), or dust storms might damage the settlements. We are in no way ready for this such natural calamities.

Mars_Dust_Storm4
Dust storm on Mars. Photo by Mars Reconnaissance Orbiter: Courtesy NASA/JPL-Caltech

Avalanche_Clouds_HiRise
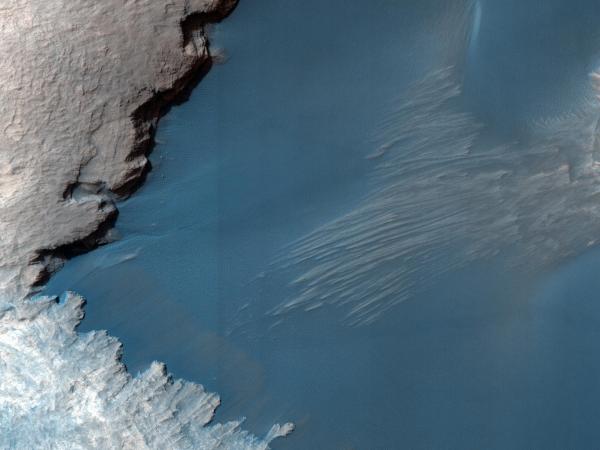
Avalanche clouds. Photo by Mars Reconnaissance Orbiter: Courtesy NASA/JPL/University of Arizona

How would the settlement communicate with their families on Earth?

Mars One will provide Internet access. That said, communication with Earth is particularly challenging. Mars is at a distance of 55 million kilometers (shortest) and 400 million kilometers (farthest) from the Earth depending on the orbital location.

The_Earth_and_the_Moon_photographed_from_Mars_orbit
The Earth and her Moon. Photo by Mars Reconnaissance Orbiter: Courtesy NASA/JPL/University of Arizona

Therefore, it would take the signal anywhere between 3 to 20 minutes to reach the Earth. You could send e-mails or use video messages, but you’d have to wait 3 to 20 minutes for your message to reach there and an equal amount of time before you hear back. There goes your Skype party.

Mars5_Sharp_Mountain_5
Panorama of Mount Sharp taken by Mars Rover Curiosity: Courtesy NASA/JPL-Caltech (click image to enlarge)

How would Mars One fund the project?

The entire project from launch to settlement would be broadcasted to generate subscription and advertising revenue. As a business model, this is quite challenging. There must be a steady stream of revenue forever so we can constantly send supplies to our colony on Mars. Shutting down the company after sending humans to Mars is not an option. This, in my opinion is the most challenging because as a business, failure is not an option! 

Ripples_in_Proctor_Crater
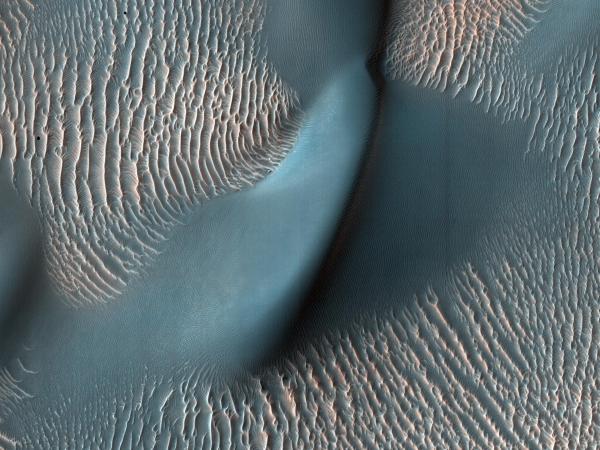
Ripples in the sand at the Proctor Crater. Photo by Mars Global Surveyor Orbiter: Courtesy NASA/JPL-Caltech 

How can I help?

There are many ways you can help this amazing project:

Sunset_on_Mars_Mars_Exploration_Rover
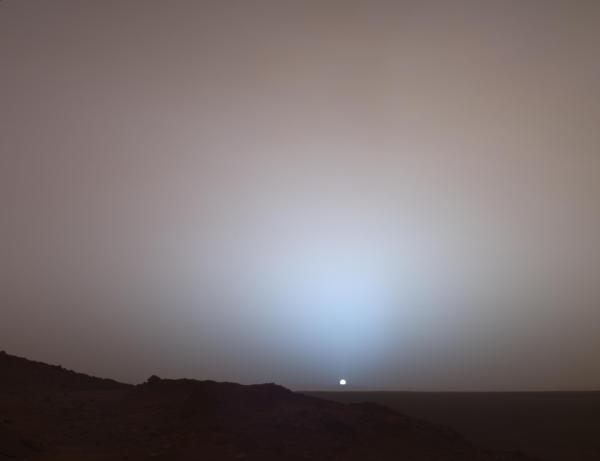
Sunset on Mars. Photo by Mars Exploration Rover: Courtesy NASA/JPL-Caltech

Finally…

Mars has the potential to be our new home. If the Mars One project is successful, there is no limit to the extent of space colonization. Thousands of people could migrate to Mars and live a great life there.

And you could be one of them.

Mars_First_Daybreak_Gale_Crater
Daybreak on Mars (at the Gale Crater). Photo by Mars Global Surveyor Orbiter: Courtesy NASA/JPL-Caltech 

Disclaimer: The Digital Dimension of Technology is an independent non-commercial technology blog. We have not been endorsed by Mars One. 

Image Courtesy: NASA/JPL-Caltech (JPL Image Policy) and  NASA/JPL/University of Arizona (HiRISE Image Usage Policy).


Managing Mobile Devices at Home

I am sure most of us have multiple mobile devices at home, such as smartphone, a tablet, or the distant cousin of the smartphone and tablet – the phablet. These mobile devices may be a combination of iOS, Android, and Windows Mobile.

With our kids, spouse, and parents using mobile devices, it becomes imperative for us to manage all these devices from a single interface. Especially with less technical users, it is important to manage tracking, apps, and other settings on the devices for them.

The Questions

When managing these mobile devices at home, there are some questions that plague us quite a bit, such as how do I:

  • Track my devices: Where are the devices right now? Where have the devices been?
  • Monitor my devices’ data: How do I monitor call history, Wi-Fi networks that the device has connected to, and Apps installed on the device?
  • Manage apps on my devices: How do I install an app on all my devices remotely? Can I delete Apps from my devices remotely?
  • Protect my devices: How do I enforce a Password Policy, remotely lock, or remotely wipe the device?

The Problem

Unlike corporate IT departments, we don’t really have a budget for advanced Mobile Device Management (MDM) solutions. So, in effect, here’s my problem:

  • I want to manage my mobile devices at home (for my family).
  • I have no money to buy an MDM solution for my home.
  • I don’t really have the training required to use an MDM solution.

The Solution

The answer to my problem is the Mobile Device Management solution by a company called 3CX. This MDM solution is cloud-based and so there is no installation required except on the mobile devices you want to manage. The 3CX Mobile Device Management solution is easy to use, has a web-based interface, and lets you manage up to 5 devices for free.

Setting up the MDM

Here’s how I set up the MDM solution on my devices:

  1. Go to http://www.mobiledevicemanager.com/ and sign-up. To activate the account, click the link in your email.
  2. Download and install the 3CX MDM App on the Android and iOS devices. When prompted, I logged in using using the credentials I created in step 1.
  3. Go to http://www.mobiledevicemanager.com/ from any browser and log in. Go to the Pending Approval node and approve the devices.

(For more information, refer to the 3CX getting started guide. It’s concise and well written.)

And Voila! The devices are visible on the web-based dashboard.

1Dashboard

The interface is clean and easy to navigate. I’ll talk about a few cool features of the MDM solution. I’ve added some screenshots of the MDM solution. You can click the images for a larger view.

Managing Mobile Devices

The Devices node lets you manage all your devices from a single interface. As you can see, both my devices are listed. One interesting feature is that the node shows you the last time when your device checked-in.2a_Device_List

Click the device you want to manage. For this example, I clicked the Android device. A few critical icons appeared as soon as I clicked the device. I’ll talk about a few important ones:

0_Device_List_Icons

  • Messaging – you can send a message to the device directly from this interface.
  • Lock – you can lock the device remotely.
  • Unlock – you can unlock the device remotely. You can also set a passcode.
  • Wipe – if the device was stolen, you can wipe the data on the device remotely.

The following tabs show a lot of useful information.

Map tab – displays the current location of the device.

2b_Map

The Info tab shows useful information about the device. I found it interesting that it was able to tell me if the device was charging or on battery. Interestingly, it displayed the memory and CPU usage too!

2c_Info

The Applications tab shows the list of applications installed on the device.

2d_Applications

The Location History tab shows all the locations where the device traveled to in a certain time frame. The grid shows a time stamp, address, and location co-ordinates. The location is accurate to a few meters. 2e_Location_History

The Call History tab shows a list of all outgoing and incoming calls with the duration.

2f_Call_History

The Policy tab lets you manage the usage policy. You can also enforce a password policy, if necessary.2g_Policy

The Wi-Fi tab shows all the Wi-Fi networks the devices connected to in a certain time frame. Interestingly, it also displays the security type and the visibility of the Wi-Fi networks that the device connected to during those times!

2h_WIFI

The Email tab lets you configure an email account on the device remotely.

Email_Tab

Navigation

The MDM has a Tree pane and an expandable node for easy navigation. You can expand nodes that have one or more sub-nodes.

3Nodes

Depending upon the node, the following information is available:

  • Dashboard –  a snapshot of the managed devices.
  • Devices – list of managed devices and detailed information shown through various tabs as described in the previous section.
  • Pending Approval – lets you approve the devices before managing them.
  • Group Policies – lets you define the behavior of certain settings. For example, your Password Policy.
  • Messages – lets you send messages to online devices.
  • Users – lets you add, modify, or delete users.
  • Alerts – lets you configure alerts for various actions performed by the device or the user.
  • App Management – lets you manage the Apps on the devices. (I will explain App Management further in this post).
  • System – settings for the Administrator.
  • Resources – help files and other useful links.

Alerts

The 3CX MDM lets you configure alerts based on various actions. Here is how the alert configuration screen looks:

4Alerts

App Management

I have saved the best for the last. App Management, in my opinion, is the most important feature of this solution. Expanding the App Management node shows these other sub-nodes:

5a_App_Management

1) Installed Apps – shows the list of apps installed on your managed devices. You can select a particular app and click Remove Application to remove the app from the device.

5b_Installed_Apps

2) App Repository – shows your own App Repository. You can create your own App Repository by adding apps from iTunes or Google Play store. You can use this repository to quickly install apps onto the managed devices. For example, if you are going to Disney world, you can add the Disney app to the repository. You can then easily deploy this app onto the devices used by your family.

5c_App_Repository

Once you have an app to the App Repository, go to Devices > [Your Device Name] > Applications (tab) > Add from Repository (button) and select the app from the dialog that opens. Select the App you want to deploy to the device and click Add.

Add_From_Repository

3) Whitelisted Apps – users of your mobile devices are allowed to download these apps. For example, I added the weather app as a Whitelisted App. The users of my managed mobile devices can now install the weather app. 5d_Whitelisted_Apps

4) Blacklisted Apps –  users of your mobile devices are not allowed to download these apps. For example, I added a poker app as a Blacklisted App.

5e_Blacklisted_Apps

Conclusion

Homes and people are now connected via mobile devices. With more and more devices entering our homes, the safety, security, and management of our mobile devices become a critical task. Consequently, Mobile Device Management solutions are not meant for corporates alone. Homes need MDM solutions too. Needless to add, you are now the IT administrator of your connected home.

Disclaimer: The Digital Dimension of Technology is an independent non-commercial technology blog. We have not been endorsed by 3CX. 

Going beyond the device: Expanding the horizons of Super Zoom

Have you ever pushed your device to the limit? Have you ever made your device do what it was not meant to do, like over-clocking your CPU or Jail-breaking your iPhone? I just did something like that. Only it’s something much safer than over-clocking or jail breaking. And I did it to my camera.

I have been using a Super Zoom camera for a while now. A super zoom camera comes with a lens that can go from a Wide Angle to Super Zoom. The Canon SX 40 HS is a good example as it can go from 24mm (wide angle) to 840mm (super zoom).

There are some advanced features that are not available in a Super Zoom. One of the most important missing features is a Remote Shutter Release option. Some DSLRs come with a Wireless Shutter Release option where you can mount your camera on a tripod and take the picture without touching the camera.

Many a time I’ve really really needed a Remote Shutter Release option. For example, when I take photos of the Moon/Super Moon or when I take artsy pictures at night. My super moon picture:

Downtown Vancouver at night:

[For more photos, visit my Photo Blog]

In such cases, I have either zoomed in quite a bit, or am taking the picture in low light conditions. The slightest shake translates into a very bad picture. To avoid shaking the camera in such cases, I usually activate the 10 second timer. But there is some residual oscillation (shake) which sometimes messes up the photos. Reading the camera’s user guide told me that that there was no inbuilt no Remote Shutter Release option available. I also visited many specialty camera in the hope of finding an external device that could act as a remote shutter release. To my utter disappointment, I could not find such a device.

Then, one fine day, I discovered CHDK – Canon Hack Development Kit. This is an open source community that creates programs for Canon cameras to add capabilities in addition to the existing features, for example, a Remote Shutter Release option. So, I decided to build my own Remote Shutter Release kit. Here’s what I did:

(A) Installed CHDK on my camera (the easy part)

To install CHDK:

  1. Go to the http://chdk.wikia.com/wiki/CHDK
  2. Check the firmware version on your camera.
  3. Download the correct build based on the firmware version. Unzip it on your computer.
  4. Copy the CHDK files on the SD card.
  5. Insert the SD card in the camera and press the Review button.
  6. Go to  Menu and update the firmware.

The program is loaded into the memory temporarily. When you shut off the camera, it is removed from the memory. The program does not interfere with the manufacturer’s original firmware. CHDK also provides a detailed user guide.

(B) Created a physical Remote Shutter Release device (the most difficult part)

I searched the Internet and discovered that I have to build a remote shutter release device on my own. I found a great video of a camera user who had built a shutter release device from scratch. I could not follow the same path since I am not as tech savvy. Imagine the trouble if I were to solder a diode onto a circuit!. Moreover, being a technical writer by profession, I believe in simplicity. I wanted a solution that was simple, easy to implement, easy to use, and of professional quality. I could not build a remote shutter release device, and nobody sold one for my camera. It seemed like a dead end.

Numerous searches on the Internet provided no answers. However, I discovered a few things that helped me create a solution for myself:

  • Send > 4V on the data port of the camera to release the shutter.
  • A very high voltage (> 8V) might damage the camera!

I performed some trial-and-error experiments and discovered a very simple solution for the problem. I used the following readymade components:

  • Duracell USB Battery Backup: I used the Duracell USB Battery Backup to experiment with the Remote Shutter Release feature of CHDK. The Duracell USB Battery Backup is rechargeable, has an ON/OFF switch, and is slightly bigger than a matchbox. It has a USB (output) port for charging external devices and a mini-USB (input) port for charging the backup battery.

  • Mini-USB cable: I used a mini-USB cable for the solution. You can easily use the data cable that came with the camera.

(C) Made the hardware and software work together

To make the hardware and CHDK software work together:

  1. Install CHDK on the SD card and update the Firmware [as explained in (A) above]. Once CHDK is in the memory, go to the CHDK menu and enable Remote Shutter. (Print button + Menu button displays CHDK menu.)
  2. Connect the mini-USB cable to the camera’s data port and the other end to the USB port on the Duracell USB Battery Backup.
  3. Switch ON the Duracell USB Battery Backup and Switch OFF immediately. The camera focuses.
  4. Switch ON the Duracell USB Battery Backup and Switch OFF immediately again. The camera releases the shutter!

And I am sure this solution will not damage the camera. Here’s the simple reason why: The camera is designed to use a mini-USB cable that is connected to a computer’s USB port (which has a ~4V output). The Duracell USB Battery Backup also has the same output since it is basically a USB port without the data transmission capabilities.

I was amazed that another device could work as a remote shutter release for a camera that was not built to use one! Amazon, eBay, camera stores, and photography forums did give me ideas for creating this seemingly simple solution. So I thought I must share this discovery with all the other Super Zoom users out there that are also looking for something similar.

Happy Super Zooming!

More information about the Duracell USB Battery Backup: http://www.duracell.com/en-US/product/instant-usb-charger.jspx

Update: May 12, 2012: If you want to use a clicker-like device, the iGo Anywhere USB Micro/Mini Charger would be ideal. Instead of a switch, you could use the button to release the shutter. For more information about iGo Anywhere USB Micro/Mini Charger, visit the Source website here. I tested it out and it works perfectly fine.

DSLR vs. Super Zoom: A user’s dilemma

When my regular point-and-shoot died, I was faced with a dilemma of whether I should go for a DSLR or a Super Zoom camera. When I was analyzing the differences between a point-and-shoot, Super Zoom, and a DSLR, the following information confused me the most:

  • Point and shoot: 10 Megapixels
  • Super Zoom: 10 Megapixels
  • DSLR: 10 Megapixels

How could three different cameras, with varied features, give the same 10 Megapixel output? (What is a Megapixel, by the way?)

I found it prudent to approach this confusion with some logical reasoning. Obviously, I needed some answers before I could pick a camera. I was looking for simple information, which was hard to find on the Internet. The information available on the Internet had too many technical details (ISO, f –stops, crop factor, depth of field) and jargons (Single-lens reflex, APS-C sensor, micro four thirds). The information available on the Internet is aimed at people who understand the nuances of photography and not end-users. Being an end-user, I wanted to cut through the jargon.

Some of the questions that I needed answered were:

  • What is a DSLR or a Super Zoom camera? (without too many technical details)
  • What are the main characteristics of each camera?
  • How are they different? (without the jargon)
  • Which one will best suit my needs?

(A) How is an image created in a digital camera?

Before going into camera types, let us look at how an image is created in a typical digital camera:

  1. Light: The essence of a photograph – light falls on the object.
  2. Object: The inspiration behind the photograph – the object, which is being photographed, reflects light onto the lens.
  3. Lens: The eye of the camera – light enters the lens.
  4. Shutter: The gatekeeper – the shutter opens for a fraction of a second to let the light in.
  5. Sensor: A Pixel is born! –light falls on the sensor and is converted into pixels. A pixel is 1 unit of the photo captured by the sensor. A photo is made up of many pixels (and hence the term Megapixel which is equal to one million pixels). Cameras had films in the past, which has now been replaced by a sensor.
  6. Processor: A byte born! –pixels are analyzed by the processor and converted to data (bytes).
  7. Storage: The photo is saved – the photo is stored as data on the memory card or internal camera memory.

Now, let us talk about different types of cameras – DSLR and Super Zoom.

(B) What is a DSLR?

A DSLR has the following characteristics:

  1. Shutter – A DSLR has a mechanical shutter. When you press the shutter release button, the shutter opens for a fraction of a second to let the light in. Anything that does not have a mechanical shutter is not a DSLR. The DSLR gives out a loud Clack sound when you press the shutter release button.
  2. Interchangeable Lenses – A DSLR has the feature of interchangeable lenses. You can use a Wide Angle lens (18-55mm) or a Zoom lens (100-300mm) depending upon your requirement. For example, if you want to shoot a large landscape view of a mountain, you could use a Wide Angle lens. If you want to go closer to an object, you could use a Zoom lens.
  3. Larger Sensor – DSLRs typically have larger sensors.

(C) What is a Super Zoom (also known as Bridge or a Hybrid Camera)?

A Super Zoom camera has the following characteristics:

  • Electronic Shutter – Super Zoom cameras do not have a mechanical shutter. The shutter is entirely electronic.
  • Single Lens – Super Zoom cameras have a single lens that can go from 24mm (Wide Angle) to 840mm (Super Zoom – and hence the name). You cannot change the lens.
  • Smaller Sensor – Super Zoom cameras have smaller sensors than a DSLR.

Super Zoom is also called a Bridge camera since a user moves from a point-and-shoot to a Super Zoom and then a DSLR. Since the Super Zoom basically, acts as a ‘bridge’ between the two types of cameras, it is called as Bridge. Also, Super Zooms have excellent lenses (comparable to entry-level DSLRs), but smaller sensor sizes. Since they perform like a point and shoot with some characteristics of a DLSR (good lens), they are also called Hybrid cameras.

(D) What is the difference in quality of photos between DSLR and Super Zoom?

With all the above information, I was still unable to figure out the exact difference between a DSLR and Super Zoom. Assuming the DLSR uses the same lens as a Super Zoom (to compare apples to apples), what does a larger sensor actually mean if both cameras are 10 Megapixels?

Here’s how I understand it – a DSLR has more definition per pixel.

Simply put, when both DSLR and Super Zooms are rated with the same Megapixel count, the DSLR has a larger surface area on the sensor to define the same pixel. Theoretically, if you had to pick out 1 pixel from a photo taken by a DSLR and a Super Zoom, the pixel from the DSLR would have more information about the image.

Let us compare the difference in definition between a DSLR and a Super Zoom to today’s Web and Social Media tools. Let us say I wanted to tell the world the difference between a DSLR and Super Zoom. I could do it in the following ways:

  • Send a Tweet in 140 words.
  • Write a Blog post in 500 or more words.
  • Create an entire Website containing 50 pages with 500 words per page.

I am saying the same thing, but in three different ways. I am getting the same message across, just in different depth. Similarly, a DSLR gives you maximum definition per pixel simply because it is able to capture more information with its larger sensor. A Super Zoom gives slightly less definition for the same image by capturing slightly less information on its smaller sensor.

A DSLR undoubtedly has the best picture quality since it packs more definition per pixel.

(E) Advantages and Disadvantages of a Super Zoom

After a lot of consideration, I finally decided to buy a Super Zoom Camera. Based on my analysis, the Super Zoom had some distinct advantages over DSLRs. The Super Zoom also had quite a few disadvantages when compared to DSLRs.

Advantages of a Super Zoom camera:

  • Compact – easy to carry around. Good for travel.
  • Cheaper – way cheaper than a DSLR.
  • Single lens – you don’t have to buy multiple lenses. You can easily go from 24mm (Wide Angle) to an 840 mm (Super Zoom). Considering the cost of multiple lenses and the inconvenience of carrying an entire bag just for lenses, the DSLR does not make sense.
  • Never lose the moment – since you can quickly go from wide angle to super zoom with the same lens, you need not fumble around for lenses and miss the moment. For example, you can capture portraits, macros, birds, or high-speed boats with equal ease!
  • Great picture quality – good for digital publishing and small-size printing.
  • Easier to maintain – dust particles entering the sensor when you change lenses is one of the greatest drawbacks of a DSLR. Since a Super Zoom has one fixed lens, there is no question of dust entering the sensor.

 Disadvantages of a Super Zoom camera:

  • Smaller sensor – Less definition per pixel. Therefore, you cannot magnify photos like you can in a DSLR. If you plan to print poster-sized photos, a DSLR is the best option.
  • Single lens – A one size-fits all lens can only do so much. Having a portrait and landscape lens helps in a better picture quality, which a Super Zoom can only try to match.
  • Less features – There are some advanced features in a DSLR that are not available in a Super Zoom. For example, a wireless remote shutter release is not available in a Super Zoom.

As far as I am concerned, I am really happy I decided to go with a Super Zoom (a Canon SX 40 HS). Whether you want to buy a DSLR or a Super Zoom really depends on your requirement, taste, budget, and how likely you are to carry the camera around. I hope this information helps you decide whether to go for a DSLR or a Super Zoom.

To see photos taken using my Super Zoom camera, visit my Photo Blog.

Simplicity. Stability. A Technological Marvel!

I was looking for an operating system that is extremely stable, required less processing power, worked on low memory, never crashed, and was very easy to use. Having used Mac OS X, Windows 7, and iOS, my expectations were extremely high. I was thrilled to discover an operating system that was simpler, better, faster, and more stable than the other operating systems I had used.

Around four years ago, I stumbled upon Ubuntu. Ubuntu changed the way I looked at operating systems. Ubuntu combines the power, stability, and security of a Linux operating system with the ease of use of Mac OS X, Windows 7, and iOS.

Ubuntu can easily revolutionize home computing, or even small business computing. Here’s why:

Simplicity

Ubuntu is extremely easy to use. A user, with absolutely no knowledge of computers, can easily start using Ubuntu. For home computing, all you need is a stable system, an excellent browser, and Office programs. Ubuntu provides all that – and more. A few years ago, I was impressed with the Apple App store that made installation very simple. Ubuntu goes farther than iOS in ease of App installation.

Stability

Firstly, Ubuntu worked smoothly on my old laptop with just 128 MB RAM and a 133MHz Celeron processor. Secondly, Ubuntu never crashed and never corrupted the installed programs. Finally, Ubuntu was inert to viruses, malware, spyware, botnets, and ransom-ware. My computer worked perfectly for many years. In fact, this is my third computer running Ubuntu.

Here’s a quick tour of Ubuntu for Netbook.

Ubuntu Desktop:

The ubuntu desktop is very clean to look at. The icons on the left give ready access to various frequently used programs. The top menu bar allows you to access advanced configuration options and various tools.

20120501-225007.jpg

Menu for Communication

The menu allows you to chat or launch an email program. You can use ALT + TAB to navigate between programs (just like Windows).

20120501-225130.jpg

Menu for Connections:

The menu allows you to connect to Wireless or Ethernet with additional connection options.

20120501-223732.jpg

Menu for Exploring the Computer:

The explorer menu helps you navigate the computer or the network right from the Desktop.

20120501-223941.jpg

Open Office: Writer

Open Office is an open source (free) program that is very similar to Microsoft Office. This program is very useful to the home user or small business. Open Office works pretty well and is extremely stable.

20120501-224108.jpg

Dashboard:

The dashboard allows you to navigate to other programs on the computer. Just move the mouse over the Dashboard icon, and additional options appear.

20120501-224418.jpg

Installing Applications:

This feature beats any know operating system – even iOS. Ubuntu displays the programs Most Frequently Used, Installed, and Apps Available for Download. Unlike Windows, you don’t have to open a browser, search the Internet, download and then install the applications. Most available applications are readily displayed and can be installed directly from list!

20120501-224528.jpg

The Cloud: Ubuntu One

Ubuntu is futuristic. Ubuntu provides a cloud to store your files.

20120501-224631.jpg

Ubuntu is an amazing operating system that can help home and small business in the following ways:

– Save money on software licensing
– Use existing hardware instead of upgrading
– Security (a UNIX core is very secure)
– Stability (a very stable operating system)
– Install Free (Open Source) programs like Open Office
– Simplicity and ease of use (easier than Windows or Mac OS X!)
– All drivers available (printer, webcam, and other drivers work fine)

Is it time to abandon Windows and Mac OS X?

(If you want to try Ubuntu without going through the trouble of installing it first, you can do so at the live Ubuntu demo: http://www.ubuntu.com/tour/en/)

ZeroLemon: The Solution for Power Guzzling Smartphones

As the world waits for the launch of the new iPhone, can you guess the most requested feature? You may be surprised to know that it is not the fingerprint scanner or a better camera. According to a poll conducted by USA Today, the most requested feature in the new iPhone is improved battery life! The iPhone (or for that matter, any smartphone) guzzles power like a thirsty horse drinking water out of a river. It’s not just Smartphones, Tablets, or Phablets that guzzle power. With the launch of the Samsung Galaxy Gear Smartwatch, wearable gadgets need powerful batteries too.

Since the launch of the first iPhone, there have been numerous advances in smartphone technology. Better processors, more memory, increasing storage, and better cameras. The only thing that does not seem to have improved much over the years is the battery.

I have used many smartphones over the years, and all of them had the same problem; a battery that runs out when I was about to send an important email at the end of the day. Or, when I needed to call home to say I am on my way.

Over the years, I have tried many battery solutions and different ways to ensure my battery remained charged:

  • Mophie Juicepack Air –  Mophie is  a case for your smartphone that also includes a battery. The battery in the case charges the smartphone’s internal battery. The disadvantage of the Mophie is the lead time for charging your phone. When you are on a call, you are consuming a lot of power. Battery charging is a slow process and Consumption is always faster than Charging.
  • iGo Green USB charger –  iGo Green is a battery that plugs into the wall for charging. Once the iGo Green is charged, you can charge your smartphone through a built-in USB port. The disadvantage of the iGo green is that you need to charge the battery first. If the battery is already drained when you need to charge your phone, you are out of luck.
  • Spare charger – Of course, you could leave one charger at work and one at home. What about the car and the meeting room? Or the transit? I can think of too many situations where you need to charge your phone and it is practically impossible to have a charger everywhere.
  • Predictive usage – If your battery goes below 10% stop watching the YouTube video and wait till you get home! Believe me, I have tried this too.

A smartphone cannot work without a charge and you are disconnected from work, home, and friends when your battery runs out. I was wondering how to ensure that my smartphone’s battery stays charged for at least 12 hours. If I could get through the day without losing charge, I could charge my phone when I got home. With superior battery technology not coming anytime soon, I had to look for a solution to stay connected.

Then I found the perfect solution – ZeroLemon.

The ZeroLemon battery is a 7000 mAH (milli-Ampere Hour) battery as compared to the original 2100 mAH battery that comes with the Samsung Galaxy S3. It is obviously more than three times the original capacity. The ZeroLemon battery takes 6 hours to charge and lasts 3 days even with heavy use! Even when I used my S3 for calls, texting, social media, Internet, Netflix, flash photography, and email, ZeroLemon refused to die.

Here are a few photos of the battery that has truly changed the way I use my smartphone:

Front of the ZeroLemon battery when compared to the original Samsung battery:

1

Back of the ZeroLemon battery:

2

Thickness of both batteries:

3

Samsung Galaxy S3 when you insert the ZeroLemon battery:

4

Samsung Galaxy S3 with the Zero Lemon battery and case:

5

Finally, if you are interested in comparing the thickness:

6

The Samsung Galaxy S3 surely gets a bit bulkier with the ZeroLemon battery. However, it is interesting to note that it is less bulkier than the OtterBox case. For a little additional weight, you get three days worth of battery. Now, you can always stay connected.

Here are the battery usage statistics from my Samsung Galaxy S3 when the ZeroLemon battery was about to run out. As you can see, the battery lasted me a full 2 days and 19 hours with 3% remaining:

Battery_Stats

ZeroLemon is available on Amazon. ZeroLemon sells extended batteries for many Android phones. Sadly, they do not sell an extended battery for the iPhone. Try out the Zero Lemon battery and let me know how you liked it.

Disclaimer: The Digital Dimension of Technology is an independent non-commercial technology blog. We have not been endorsed by ZeroLemon. 

Where the Worlds Collide: Smartphones turn into Desktops (or SmartTops*)

The past decade has seen more technological innovation than the past century – at least in the world of mobile computing. Netbooks, Smartphones, Tablets, and finally Phablets have revolutionized the world.

A new phenomenon is emerging – where Smartphones are turning into desktops. Sounds funny, doesn’t it?

Consider this: What’s the configuration of your smartphone? Most likely, it’s a dual-core processor with at least 2 GB RAM, and a 32 GB of disk space. Good examples are an iPhone 5 or a Samsung Galaxy S3. What’s the configuration of your home computer? Most probably, the processor is lesser than a dual-core, with 2 GB RAM, and a large hard disk. Putting all of these together, your smartphone today may as well have more processing power and memory than your basic home computer.

Yet, we have a home computer, for general Internet surfing, printing, or for things that you can’t yet do with your smartphone. And yet, most of us carry a smartphone.

Here’s a revolutionary idea: What if your smartphone could also be your home computer?

And this revolutionary idea comes to you not from Apple or Google, but from Canonical, the guys that brought you Ubuntu. Canonical has released a developer version of Ubuntu for Mobile. You can load this operating system on your smartphone. You can connect your smartphone to a dock to switch to Desktop Mode. You can then use your smartphone as a desktop computer simply by connecting a mouse, keyboard, and monitor to the dock. After using your Smartphone as a Desktop, just unplug it and put it in your pocket!

Here is a conceptual representation of the setup:

Ubuntu_Mobile

Intriguing? I think so. Here’s where you can read more about Ubuntu for Mobile: http://www.ubuntu.com/devices/phone

In my opinion, here are some advantages of using a single device (for a home user):

  • Programs: Install all software programs on only one device..
  • Data: Store your data on only one device (may also be synced to a cloud).
  • Mobility: Carry the device around.
  • Security: Manage security for only one device (anti-virus, anti-spyware, anti-malware, theft protection etc.)
  • Cost: Cheaper, since there is only one device to buy.
  • Software Updates: Update software on only one device.
  • Space: Saves space in your home.
  • Environment friendly: Save power and creates less electronic recycling.

Here are some advantages of using a single device (for a business):

  • Mobility: Welcome to the mobile enterprise – all employees are mobile.
  • Mobile Device Management: IT administrators can now use Mobile Device Management instead of Desktop Management solutions (the desktop market is shrinking anyways).
  • Licensing: Save on licensing costs for expensive programs.
  • Unified Threat Management: Unified Threat Management on only one device – a boon for IT administrators.

I would love to have an Ubuntu Smartphone that is also my home computer.

In all fairness and much as I love the concept, there are some serious disadvantages to using an Ubuntu phone as a computer:

  • Processor Speed: Can we have a processor that is as fast as Core i7 on a Smartphone? Not yet.
  • Memory (RAM): Smartphones are yet to reach the 8 or 16 GB category.
  • Network Speed: Smartphones do not have Gigabit Ethernet. Ethernet ports are still very useful when it comes to communicating over high-speed networks.
  • Battery Technology: How reliable are smartphone batteries? Obviously not as reliable as a desktop computer that is plugged into a power line. (You might want to read more about my idea on battery technology in my earlier post Is the Smartphone Industry Curious about Curiosity?.)
  • Applications/Programs: Finally, the obvious – Ubuntu for Mobile may not have as many programs as Windows. Windows still rules the market with millions of programs, drivers, and tools for business.

I guess technology has reached a full circle from Desktops > Laptops > Netbooks > Smartphones > Tablets > Phablets > finally to SmartTops*!

Let’s wait and watch to see if SmartTops* rule the market like Smartphones or Tablets.

*SmartTop is not an industry terminology. I came up with this term for this blog post. Remember, you heard this word here first. Ubuntu for smartphones may get in touch with my $$ anytime soon 🙂


DSLR Concepts: The watered down basics

For as long as I can remember, I have been a point-and-shoot enthusiast. After using a bridge (SuperZoom) camera for a long time, I finally upgraded to a DSLR.

When I upgraded to a DSLR, I started learning about the various aspects of DSLR photography. I read many blogs, websites, and books that attempted to explain the basics. In my humble opinion, however, all these sources were a little too technical when it came to explaining one concept – exposure.

After reading the definitions from various sources, I would always come away with a few questions:

  • What does exposure really mean?
  • What is the relationship between aperture, shutter speed, and ISO?
  • Do I really need to understand these concepts to take good photos?

For a person who has been taking photos for over a decade now, I found these concepts intriguing. I found a lot of technical explanations online for aperture, shutter speed, and ISO. But just like exposure, I found nothing that tied them all together in an extremely simple manner.

This blog post is my attempt at explaining the basic concept of exposure, as I understand it today.

What is Exposure?

A photo is all about light. Exposure is nothing but the quantity of light that is used to create a photo in a camera.

Before going into aperture, shutter speed and ISO, let us try to understand what one must do to fill 1 bucket of water. (Huh?)

Let’s assume you have the following three items to fill 1 bucket of water:

A pipe that carries water.

A valve that opens and closes.

A bucket of a certain size.

For the sake of simplicity, let’s say you could fill 1 bucket with the following parameters:

Use a pipe of 10-inch diameter.

Open the valve for 10 seconds.

Use a bucket of a 10-liter capacity.

It’s simple isn’t it?

Let’s compare the idea of filling 1 bucket of water to the concepts of photography:

Pipe = Aperture (the diameter of the opening that allows light into the camera)

Valve = Shutter (can be opened for a pre-defined number of seconds)

Size of the bucket = ISO (time taken to fill the bucket; smaller the bucket, the faster it fills up).

So, based on how much water you want, you can fill 1 bucket of water in any of the following ways:

  • Use a 10-inch pipe, open the valve for 10 seconds, and fill a bucket of 10 liters.
  • Use a 5-inch pipe, open the valve for 10 seconds, and fill a bucket of 5 liters.
  • Use a 10-inch pipe, open the valve for 5 seconds, and fill a bucket of 5 liters.

Water vs. Light

The world of DSLR photography with light is not different from filling water in a bucket. You can create a photo by adjusting any of the following parameters to adjust the quantity of light used to create a photo because:

Exposure = Aperture + Shutter Speed + ISO

  • Aperture: Increase the Aperture for more light and decrease it for less light.
  • Shutter Speed: Decrease the Shutter Speed (shutter stays open for a longer duration) for more light and increase the Shutter Speed (shutter stays open for a shorter duration) for less light.
  • ISO: ISO defines how sensitive the sensor is to light. In the older non-digital camera days, films were used to take photos. A term called film-speed was used define how soon the photo was created on the film when light fell on it. A 100 film-speed was less sensitive and 200 film-speed was more sensitive to light. With DSLRs, the term called ISO is used to define how sensitive the sensor is to light. The higher the ISO setting on your camera, the more sensitive it is to light.

Theoretically, you could increase one parameter and decrease the others to ensure that the same quantity of light creates the digital image.

Here are a few examples of a candle photographed with different settings:

1) Auto Mode:

2) High ISO (More Sensitive to Light): Aperture f5.6, Shutter Speed 1/125 second, ISO 1600

3) High Shutter Speed (Less Light): Aperture f5.6, Shutter Speed 1/1000 second, ISO 100

4) Low Shutter Speed (More Light): Aperture f5.6, Shutter Speed 1/5 second, ISO 100

4) Low Aperture (Less Light): Aperture f16, Shutter Speed 1/125 second, ISO 100

If you are using a DSLR in Auto mode, a good way to see the values for Aperture, Shutter Speed and ISO is to view the properties of the photo. Better still, you can adjust these parameters to see what effect this has on a photo.

You don’t really need to know these concepts to take a good photo in Auto mode. However, to upgrade from a point-and-shoot mode to a serious hobbyist mode, these concepts are extremely useful. There is so much more you can do in composing the photo if you know how these concepts (Aperture, Shutter Speed and ISO) work together to bring a ‘Digital Photo’ into existence!

Stay tuned for future blog posts on other photography concepts like f-stop, crop factor, and lenses.

To see my photos, visit my Photography Blog.