Managing Mobile Devices at Home

I am sure most of us have multiple mobile devices at home, such as smartphone, a tablet, or the distant cousin of the smartphone and tablet – the phablet. These mobile devices may be a combination of iOS, Android, and Windows Mobile.

With our kids, spouse, and parents using mobile devices, it becomes imperative for us to manage all these devices from a single interface. Especially with less technical users, it is important to manage tracking, apps, and other settings on the devices for them.

The Questions

When managing these mobile devices at home, there are some questions that plague us quite a bit, such as how do I:

  • Track my devices: Where are the devices right now? Where have the devices been?
  • Monitor my devices’ data: How do I monitor call history, Wi-Fi networks that the device has connected to, and Apps installed on the device?
  • Manage apps on my devices: How do I install an app on all my devices remotely? Can I delete Apps from my devices remotely?
  • Protect my devices: How do I enforce a Password Policy, remotely lock, or remotely wipe the device?

The Problem

Unlike corporate IT departments, we don’t really have a budget for advanced Mobile Device Management (MDM) solutions. So, in effect, here’s my problem:

  • I want to manage my mobile devices at home (for my family).
  • I have no money to buy an MDM solution for my home.
  • I don’t really have the training required to use an MDM solution.

The Solution

The answer to my problem is the Mobile Device Management solution by a company called 3CX. This MDM solution is cloud-based and so there is no installation required except on the mobile devices you want to manage. The 3CX Mobile Device Management solution is easy to use, has a web-based interface, and lets you manage up to 5 devices for free.

Setting up the MDM

Here’s how I set up the MDM solution on my devices:

  1. Go to http://www.mobiledevicemanager.com/ and sign-up. To activate the account, click the link in your email.
  2. Download and install the 3CX MDM App on the Android and iOS devices. When prompted, I logged in using using the credentials I created in step 1.
  3. Go to http://www.mobiledevicemanager.com/ from any browser and log in. Go to the Pending Approval node and approve the devices.

(For more information, refer to the 3CX getting started guide. It’s concise and well written.)

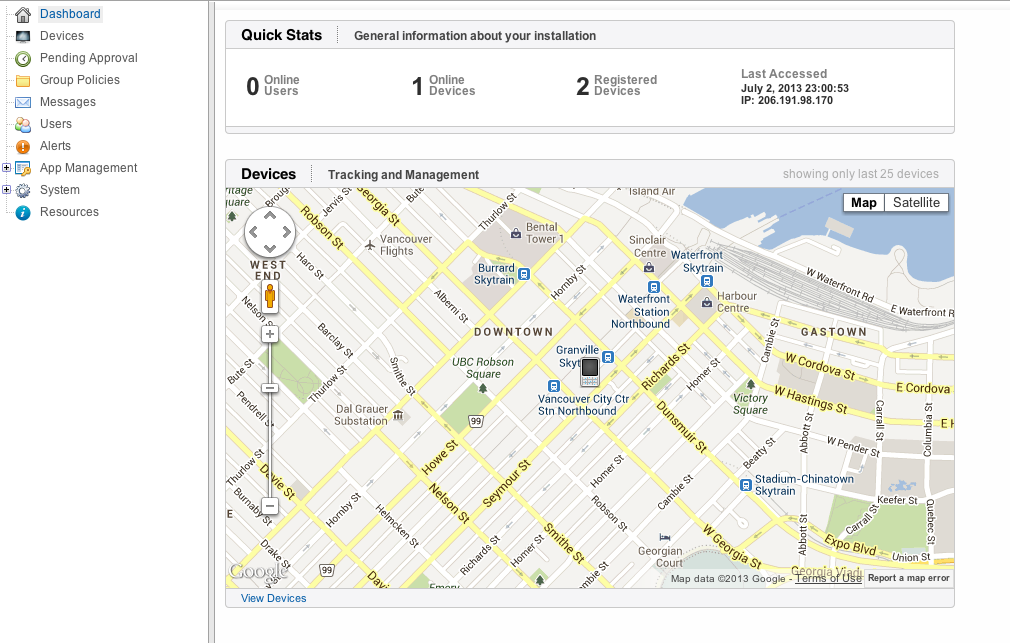
And Voila! The devices are visible on the web-based dashboard.

1Dashboard

The interface is clean and easy to navigate. I’ll talk about a few cool features of the MDM solution. I’ve added some screenshots of the MDM solution. You can click the images for a larger view.

Managing Mobile Devices

The Devices node lets you manage all your devices from a single interface. As you can see, both my devices are listed. One interesting feature is that the node shows you the last time when your device checked-in.2a_Device_List

Click the device you want to manage. For this example, I clicked the Android device. A few critical icons appeared as soon as I clicked the device. I’ll talk about a few important ones:

0_Device_List_Icons

  • Messaging – you can send a message to the device directly from this interface.
  • Lock – you can lock the device remotely.
  • Unlock – you can unlock the device remotely. You can also set a passcode.
  • Wipe – if the device was stolen, you can wipe the data on the device remotely.

The following tabs show a lot of useful information.

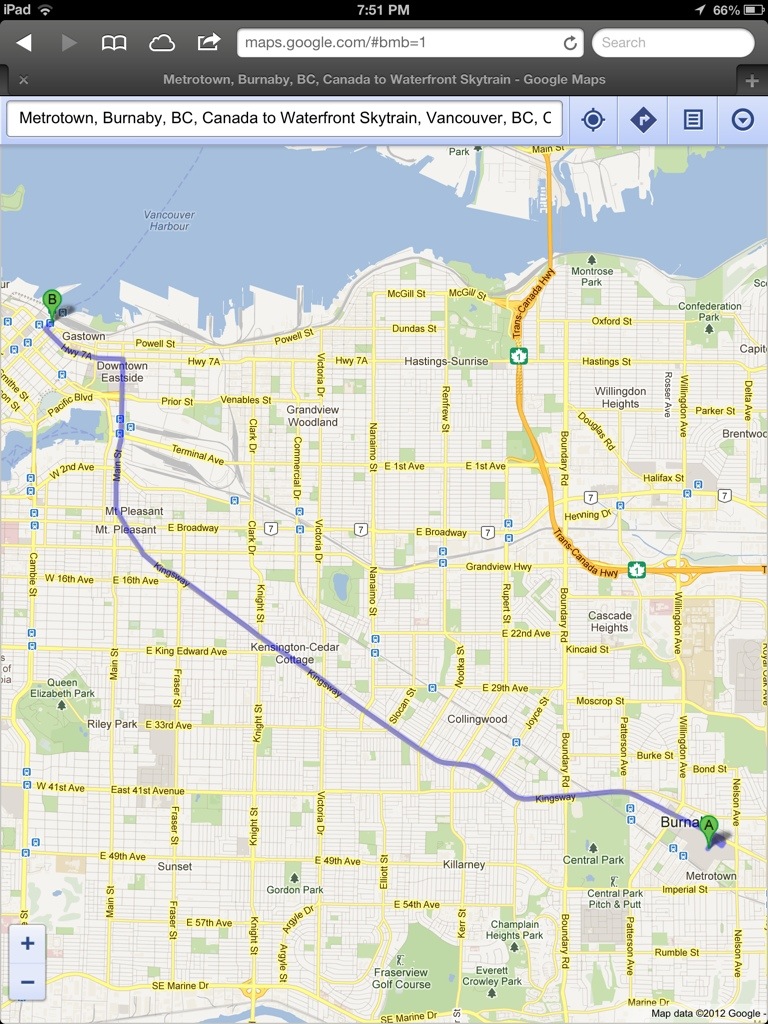
Map tab – displays the current location of the device.

2b_Map

The Info tab shows useful information about the device. I found it interesting that it was able to tell me if the device was charging or on battery. Interestingly, it displayed the memory and CPU usage too!

2c_Info

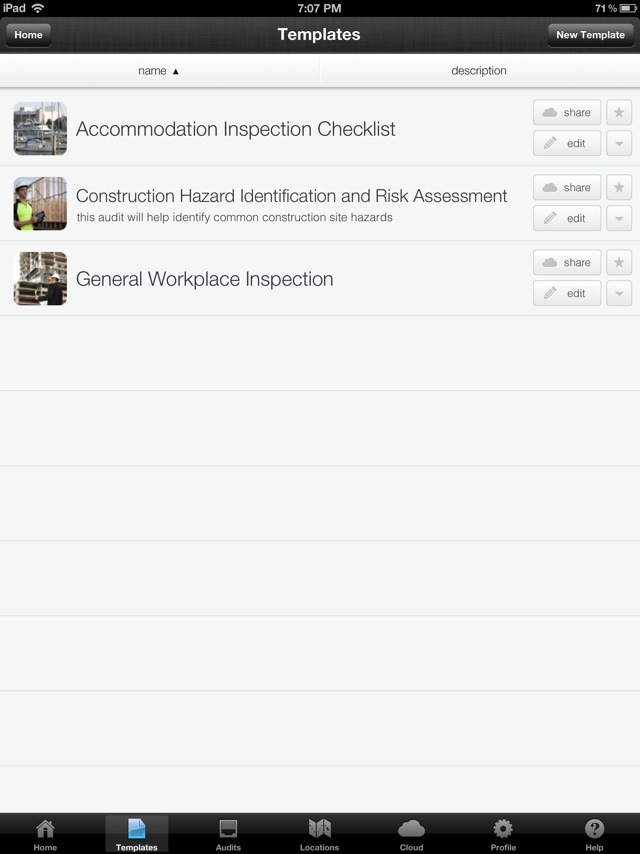
The Applications tab shows the list of applications installed on the device.

2d_Applications

The Location History tab shows all the locations where the device traveled to in a certain time frame. The grid shows a time stamp, address, and location co-ordinates. The location is accurate to a few meters. 2e_Location_History

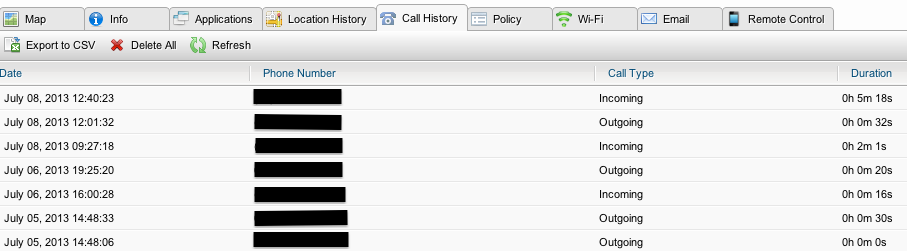
The Call History tab shows a list of all outgoing and incoming calls with the duration.

2f_Call_History

The Policy tab lets you manage the usage policy. You can also enforce a password policy, if necessary.2g_Policy

The Wi-Fi tab shows all the Wi-Fi networks the devices connected to in a certain time frame. Interestingly, it also displays the security type and the visibility of the Wi-Fi networks that the device connected to during those times!

2h_WIFI

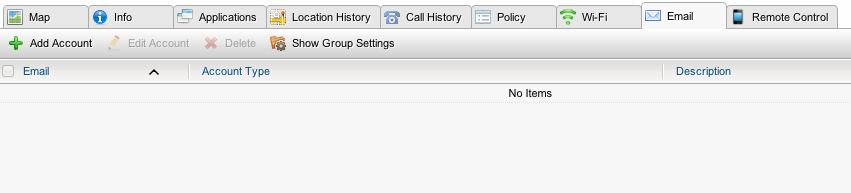
The Email tab lets you configure an email account on the device remotely.

Email_Tab

Navigation

The MDM has a Tree pane and an expandable node for easy navigation. You can expand nodes that have one or more sub-nodes.

3Nodes

Depending upon the node, the following information is available:

  • Dashboard –  a snapshot of the managed devices.
  • Devices – list of managed devices and detailed information shown through various tabs as described in the previous section.
  • Pending Approval – lets you approve the devices before managing them.
  • Group Policies – lets you define the behavior of certain settings. For example, your Password Policy.
  • Messages – lets you send messages to online devices.
  • Users – lets you add, modify, or delete users.
  • Alerts – lets you configure alerts for various actions performed by the device or the user.
  • App Management – lets you manage the Apps on the devices. (I will explain App Management further in this post).
  • System – settings for the Administrator.
  • Resources – help files and other useful links.

Alerts

The 3CX MDM lets you configure alerts based on various actions. Here is how the alert configuration screen looks:

4Alerts

App Management

I have saved the best for the last. App Management, in my opinion, is the most important feature of this solution. Expanding the App Management node shows these other sub-nodes:

5a_App_Management

1) Installed Apps – shows the list of apps installed on your managed devices. You can select a particular app and click Remove Application to remove the app from the device.

5b_Installed_Apps

2) App Repository – shows your own App Repository. You can create your own App Repository by adding apps from iTunes or Google Play store. You can use this repository to quickly install apps onto the managed devices. For example, if you are going to Disney world, you can add the Disney app to the repository. You can then easily deploy this app onto the devices used by your family.

5c_App_Repository

Once you have an app to the App Repository, go to Devices > [Your Device Name] > Applications (tab) > Add from Repository (button) and select the app from the dialog that opens. Select the App you want to deploy to the device and click Add.

Add_From_Repository

3) Whitelisted Apps – users of your mobile devices are allowed to download these apps. For example, I added the weather app as a Whitelisted App. The users of my managed mobile devices can now install the weather app. 5d_Whitelisted_Apps

4) Blacklisted Apps –  users of your mobile devices are not allowed to download these apps. For example, I added a poker app as a Blacklisted App.

5e_Blacklisted_Apps

Conclusion

Homes and people are now connected via mobile devices. With more and more devices entering our homes, the safety, security, and management of our mobile devices become a critical task. Consequently, Mobile Device Management solutions are not meant for corporates alone. Homes need MDM solutions too. Needless to add, you are now the IT administrator of your connected home.

Disclaimer: The Digital Dimension of Technology is an independent non-commercial technology blog. We have not been endorsed by 3CX. 

Advertisement

Apple Maps vs. Google Maps – a user’s perspective

When Apple decided to abandon Google Maps and create its own, users expected Apple to create the next generation mapping product. However, when Apple launched its maps with iOS 6, there were reports of multiple errors in Apple Maps. Collapsed bridges, wrong names, and non-existent landmarks were a few errors blown out of proportion by the media.

Do Apple Maps really suck? Are the maps unreliable? As an iOS 6 user, would I get lost without Google Maps?

The only way to answer these questions is for me to compare both maps using a user-centric approach. I decided to analyze the route from place A to place B using both maps. For my test, I chose two well-known landmarks in the Vancouver Lower Mainland, that is starting from the Metropolis at Metrotown Mall to the Waterfront Skytrain Station.

Apple Maps: Here is the route displayed by Apple Maps:

20120930-201318.jpg

The map view looked alright to me. However, to be more accurate, I looked at the list view:

20120930-201444.jpg

What I liked about the Apple Maps (list view) was that Nelson St, Hazel St, and Miller Ave were displayed. Depending upon where exactly the user was, one of the streets would be visible within 100-150 meters. Apple maps took me through the Dunsmuir viaduct and finally Cambie St, Pender St, and Seymour St directly into Downtown Core. As a person who lives here, the route looked alright to me.

Google Maps: Here is the route displayed by Google Maps:

20120930-202205.jpg

Let us see the Google Maps route using the list view:

20120930-202307.jpg

Apple Maps seemed to be taking a slightly different route, but at first glance, neither route is glaringly incorrect. Google Maps was taking another route via Main St and Hastings St to Seymour St and finally to Downtown Core. In the Google Maps route, the first step struck me as strange. Google Maps tells the user ‘Head Northeast’. How is the user supposed to know what Northeast is? Unless the user is holding a compass, it is not user-friendly to say head in a particular direction.

Both routes are correct. However, here are the differences:

Apple Maps:

  • Specifies each street right from the start to the end. Does not say head ‘in a particular direction’.
  • Gives turn-by-turn navigation via large, unmistakeable labels on the map.

Google Maps:

  • Says head Northeast at the start of the route. Pointing users in a direction rather than towards a street, in my opinion, is not user-friendly.
  • Provides street-view, showing users exactly where they need to go.

Aside from the above differences both Apple and Google maps seem to be quite accurate. Considering the fact that Apple Maps is just the first version and the error-reporting is crowd-sourced, I am sure the accuracy of the maps will improve as users use them more and more.

As for the errors like collapsed bridges and non-existent landmarks, Apple has no option but to fix them as soon as possible.

(Edited by Prarthna Sri)


Auditing in a touch-screen world!

Every time I inspected a home before renting it out, or even before buying it, I wish I had a quick checklist of repairs or cleaning required. In the absence of a checklist, there was no perfect way to record the defects in a house. Not having a checklist would lead to problems later – if both parties do not agree to defects. For example, you may have to pay for the stain on the carpet that was not your fault.

I found this amazing app called iAuditor. The iAuditor has a few built-in checklist that can be filled out using an iPad or an iPhone. The UI is a very simple and intuitive:

20120430-011328.jpg

I started a new Audit. The App has a few built-in checklists (you can also create your own customized checklist):

20120430-011531.jpg

I decided to try out the Accommodation Inspection Checklist:

20120430-011632.jpg

The checklist has the following options: Yes, No and Not Applicable. Selecting No gives an option to directly add photographic evidence of non-compliance by clicking the Camera icon.
20120430-012911.jpg

There is also an option to add additional comments. An interesting feature of the App is the option for both parties to add signatures directly from the iPad!

20120430-012104.jpg

Once both parties have signed on the Audit checklist, the App gives an option to directly export to PDF. This is how an exported PDF looks:

20120430-012246.jpg

As a Technical Writer, I am extremely impressed by the perfectly formatted PDF output. I can imagine hundreds of good uses for this App in business. The following uses come to my mind:

– Safety Inspection
– Regulatory Compliance
– Manufacturing
– Pharmaceuticals
– Construction
– Real Estate

In addition to the above business uses, this App can be used in personal situations as well.

The next time you check out a home for rent, make sure to carry your iPad or iPhone. Using the iAuditor App, carefully track the defects that need to be fixed. If not, don’t be surprised if you are dinged for a stain on the carpet that existed before you moved in!

Milk, Diapers, and an iPad

During my recent visit to the Apple store, I saw Apple experts demonstrating an iPad to a group of kids and their parents. I increasingly see kids holding iPads instead of toys. An iPad is expensive, and fragile. I was curious see how a 2-year old could use an iPad. Most importantly, I was also curious to see if an iPad App was simple to use for a kid.

I downloaded Crayola Paint and Create – a free App for the iPad. I was interested in studying the features, user interface, user interaction, and the overall user experience. This is how the App looks:

20120421-192410.jpg

The main elements were Coloring Pages, Fun Activities and Free Draw. I decided to use Coloring pages and color a drawing:

20120421-192638.jpg

I clicked the Crayola icon at the bottom of the screen to display various types of crayons with different colors. You can see the following icons on the right: Pause (to pause the movements like snow falling or pause other interactive elements), Undo, Redo, New, Settings, Share (to share via email or on Facebook), Help, and Exit.

20120421-192912.jpg

This is how a partially colored coloring page looks:

20120421-193208.jpg

I could easily use different colors and fill different parts of the page with solid colors. This is how a fully colored page looks:

20120421-193451.jpg

The app is configured to use a finger by default. There is also a setting to use an iMarker instead of a finger (an iMarker is like a pencil that can be used with the iPad). Obviously, the Help and Settings are a little complicated for kids since they may not be able to read. Apart from Help, Settings, and Share, the other options were extremely easy to use.

What is Apple’s strategy to promote iPads for kids by launching a Kids Corner in the Apple store? What is the value proposition for parents to purchase such and expensive device for their kids? Here’s what I think:

Get an Apple user for life – That’s right. Catching them young will ensure they are Apple users for life! Kids will never choose an Android device or another tablet if they are introduced to the iPad at the age of 2. Apple’s strategy of catching users at a very young age will lead to huge revenue for years to come.

Reduce cost per user – The cheapest iPad costs approximately 400$. If a family of four – two parents and two kids use an iPad, the cost of buying an iPad is divided by 4. Although families do not use terms like Cost per User to decide whether to buy an iPad, they definitely calculate it sub-consciously.

Tap a new market segment – Kids are a huge market segment – not just for games, but also in the field of education. Tapping this market segment leads to a huge revenue for Apple.

Use kids to market the iPad and Apps – I was amazed to see how Apple was using kids to market the iPad. With the Share option, kids could share their coloring pages with their friends (the parents might share it for them). Other kids looking at these colorful pages would want to do the same. Not only is Social Media being introduced at a very young age, the iPad is being marketed via Word of Mouth (the most powerful way to influence prospective buyers).

Save money for families and schools – Families and schools can save money on paper, crayons, and other consumables required on a daily basis.

A safer option – Kids (at home or in Pre-K) eat crayons that may be harmful for their health. Since the crayons on an iPad are electronic, it is very safe for kids.

Save the environment – Reducing the usage of paper obviously save trees.

Crayola Paint and Create gave me great insights to Apple’s strategy. I could also envision the future – where most of the interaction happens through touch screens instead of keyboards. It also helped me realize that language will never be a barrier for user interaction since expressive icons are a great way to communicate with the user. Intelligence, knowledge, skills, language, and education will never be a barrier for users in the world of touch screens.

Hello kids, welcome to the iWorld!